Hatching baby chicks or simply buying day old chicks and raising them is a good way to start or add to an existing flock. To cut down on deaths, sicknesses, and problems, it is good to know what to expect and what supplies to have on hand. Having hatched out and raised chicks every other year for the pass 40 years, here are some things I have learned and some helpful tips.
A pen for the baby chicks and their mother will be needed. Pens that are up off the ground are best and putting it inside an existing chicken yard or pen to help guard against predators such as cats, dogs, snakes, and rats, is a good idea. My pen measures 4 ft. by 6 ft. and is 18 inches high which is plenty big enough for raising up to 30 chicks until they half grown. The pen was built by driving six pieces of metal pipe into the ground for legs that hold it some 4 ft. off the ground. Schedule 40, 1 1/4 inch PVC is good for making a pen frame as long as the pieces are not over 3 1/2 ft long. Build it with front, back, and middle cross pieces for bracing and to support the flooring wire and roofing material. The flooring wire should be the stiff hardware cloth type wire and then it is overlaid with vinyl window screening. The screening will keep feed from falling through the wire and being wasted. The wire on the rest of the pen can be regular small opening chicken wire or plastic wire attached with wire ties or nylon string. Plan for doors on both long sides so it is easy to reach all parts of the pen to catch chicks. Cover one of the short sides, the north side, with either tin or vinyl siding, along with at least a third of one of the cornering long sides. This will give the chicks protection from wind and blowing rain. Cover only 2/3rds of the top so they can get some sun. Vinyl siding can be attached to the PVC with screws while tin can have holes punched in it and be tied on using wire. Be careful of sharp edges when working with sheets of tin.
Hatching out baby chicks will mean waiting for a hen to get broody and want to set or buying an incubator to be able to hatch eggs. I have never used an incubator so I cannot help with buying or using those. It is impossible to make a hen set or get broody but the signs of one setting are easy to spot. She will not want to leave the nest and will puff herself up, pecking and fussing if removed. She will walk around at feeding time puffed up, making clucking noises, and want to fight with other hens. Don't give her any eggs for setting on until she has proven that she is calm enough to stay on the nest and is really setting. She will need a nest box all to herself for the incubation period of 21 days. It should be off the ground and where she can be easily checked on each day. I close off one of my regular nest boxes so the other hens can't get into it, give it a good layer of straw, and make sure it won't be in the hot sun or any cold drafts. A solid floor and sides are important to stop drafts. If buying baby chicks either at a local supplier or through the mail, be sure to have everything ready before their arrival date.
Don't try to hatch or raise chicks too early in the spring unless they're going to be kept inside for the first six weeks or so. If night time temps get below 60 degrees the young chicks will need supplemental heat. Here in the deep south I can hatch as early as late April and as late as mid June. Hatching too late is not good either because high temps will make eggs go bad as well as kill chicks and the chicks will not be old enough when the weather turns cold again. When ordering chicks through the mail, check on the company's shipping dates. Most hatcheries will only ship after warm weather and before the heat of summer have set in. If setting a hen, pick out enough good solid looking eggs, not overly large ones, so that the hen will be able to cover them all. I have set up to 20 eggs under a really large hen. Mark each with a penciled X on one side to be able to check that the hen is turning the eggs each day and just in case another hen gets in with her and lays a new egg. Put them in the nest and let her walk over to them to settle herself in, then leave her alone for two days before bothering her.
Mark a calender with the hatching date. She doesn't need to come off the nest for some three days, but should be checked daily to be sure nothing is wrong. On the third day pick her up and set her on the ground with some water and feed. If the hen is not very tame and hard to catch, it may be a good idea to tether her to something using a string around one leg. She will probably also like a good dry dust bath before going back on the nest. While she is eating check for any cracked or broken eggs. Remove any cracked ones and if any get broke then the nest will have to cleaned along with any other soiled eggs. Use a warm damp cloth and don't let the eggs get chilled so work quickly. Any eggs that get egg material on them will go bad if not cleaned and they will all go bad if the nest is not cleaned and the straw replaced. When the hen is put back check her feathers for egg material and clean her. Hopefully this won't be necessary. She only needs to be taken off the nest once every other day for the first week to 10 days, then let her off everyday after that. Don't be surprised by the size and smell of her droppings, just have a shovel ready. As the hatching date nears, get the needed supplies ready, a bag of chick starter, some coccidostat medicine for their water, a waterer that is easy to handle and keep clean, a large box (2 to 3 ft. square) with lots of newspaper, a feeding trough, and a source of heat such as a extension cord with a candescent light. The chicks will probably not all hatch on the same day and it can take 3 days for all the eggs to hatch. The hen may want to leave the nest when the first few chicks hatch out. To keep her from doing this it is best to remove the early hatching chicks as soon their eggs start to hatch and place them inside under the warm light to finish hatching. Do not try to help any of the chicks out of their eggshells and do not disturb the hen anymore than possible when hatching starts. Just quietly lift up one of her wings to check on the eggs and don't pick her up or she may step on one of the chicks. There is a lining on the inside of the eggshell that will be filled with blood. If this lining is broken too soon then the blood loss can kill the chick. The chick needs to hatch out of the shell slowly, over a period of hours so all the blood drains out of the lining and goes into the chick's system. To judge how close a light needs to be placed to these hatching eggs, use how it feels on a hand. If it feels like it is burning the skin, it is too close, if it doesn't feel warm on the skin, it is too far away. It needs to feel nice and warm.
Place the dry, completely hatched chicks in the newspaper lined box and keep it away from where the hen can hear them or she may try to leave the nest. The chicks don't need to be handled too much, the stess will weaken and can kill them. They can live off the stored up nourishment from the egg yolk for some 24 hours after hatching, so don't worry if they don't eat for awhile. Give them a shallow dish of water and dip their beak into it when putting them into the box and scatter some feed on the paper. If they peep loudly and huddle together, they may be cold. Hang the light over one corner of the box, being sure its not so close to any paper that it may start a fire. Check on the chicks after a few minutes, if they are huddled away from the light it may be too hot. Move it away or get a smaller bulb. Any eggs that have not hatched after 3 days are probably rotten and best disposed of by burying. Be careful handling them, they will explode from built up gases and that is not fun.
Now all the chicks can be put back under their mother and she and her brood can be moved to the pen that was built. Sometimes a hen will not take all the chicks and will kill any she doesn't want. If that happens there are two choices, one -raise the unwanted chick by yourself -not easy to do with only one chick, or take them all from the hen and raise them yourself -usually the best bet. Chicks will be healthier raised in a group. Feed the young chicks twice a day all they will eat. They will make it known if they are hungry by peeping loudly. Be sure they have clean water at all times but don't use a deep waterer due to the danger of drowning. Use a coccidostat medicine in their water so they won't get sick. This is especially needed if the chicks are around other chickens.
Watch for any chicks that are getting pecked on for any signs of blood. The other chicks will repeatedly peck at any bloody spots and kill the hurt chick. There are anti-peck salves for dressing wounds, but the hurt chick must be separated from the others as long as they peck at it. There may have to be some hard decisions made, such as what to do to any sickly or malformed chicks that cannot get around or eat properly. Be ready for questions from young helpers and help them to face up to life's hardships. If raising the chicks without a mother hen, they will have to be brought in at night to be kept warm, for the first 3 weeks or so depending on the temperatures. Place several layers of newspaper in a large box for keeping the chicks in at night and during bad weather. Remove the papers as they get soiled and dampened. Newly hatched chicks and chick feed will attract ants so the legs of the pen may have to be sprayed with ant poison to keep them away during hatching and later.
The chicks will start to grow feathers after just a couple of days and will be well feathered after some 4 to 6 weeks, then they can be placed in a larger yard on the ground with a shelter of some sort. If fowl pox is a problem in the area, then the chicks will need to be vaccinated during the first two weeks or so. Smiths Poultry supplies sells the vaccine and it is easy to administer. Coccidiosis and fowl pox are two dieases often carried by older birds that can quickly kill young chicks. The hen can stay with them as she will watch and warn them of dangers such as cats, snakes, and hawks. It is best to have netting over their pen to prevent them from flying out and hawks from diving in. Start feeding them chick grower after 3 weeks and then start them on scratch feed after 5 weeks. A good starting grain for young birds in wheat because of its size, softness, and high food value. Mix it in with some cracked corn and don't forget they will need some grit and oyster shells when they start to eat hard grains. By the end of the summer they should be fine young cockerels and pullets, and next spring the pullets will start laying.
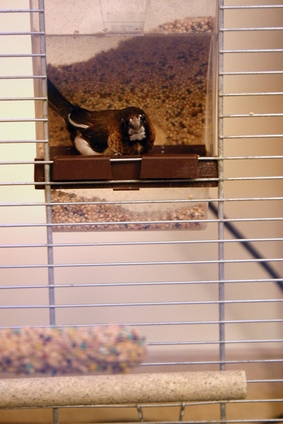 Homemade Indoor Bird Cages
Homemade In
Homemade Indoor Bird Cages
Homemade Indoor Bird Cages
Homemade In
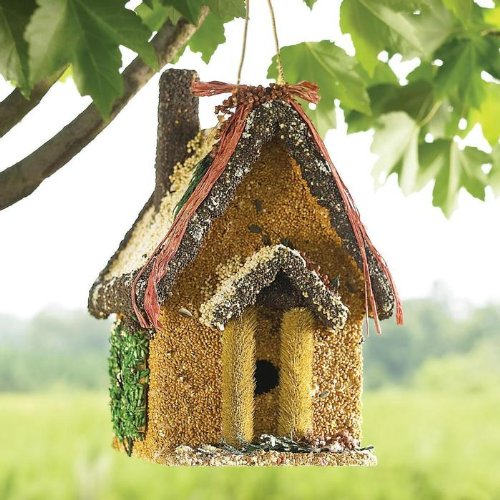 How to Make Edible Bird Houses That Double as Homemade Bird Feeders
If you love the idea of crea
How to Make Edible Bird Houses That Double as Homemade Bird Feeders
If you love the idea of crea
 A Guide to Song Group Canaries
The Three Canary Groups - Co
A Guide to Song Group Canaries
The Three Canary Groups - Co
 Military Macaws
Common Name:
Military Macaws
Common Name:
 A Guide to Colour Group Canaries
The Three Canary Groups - Co
A Guide to Colour Group Canaries
The Three Canary Groups - Co