Before we start, I have to confess, I’m not a professional aviculturist. Like the majority of people who get pleasure from the company of birds, I make my living in Southern California in an unrelated field. For me, keeping and watching birds is a hobby. It's an activity that calms my nerves, and allows me to focus on those things in life that are truly important. My real job pays the bills and ensures the care of my family... and our birds.
Since childhood, I've always found observing nature to be one of the most relaxing and fascinating of activities. When I was a kid in Wisconsin, I brought a bit of the outdoors inside by spending my newspaper route money on pet tropical fish and finches. This love of the natural world is as strong now as in my childhood, and I like to think I’ve wisely passed the heritage on to our children.
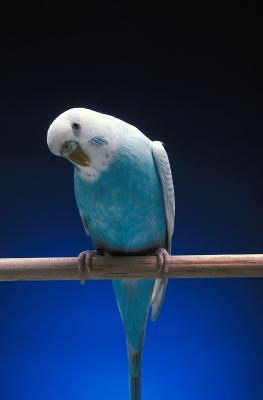
In the spring, our six-year old daughter Amber’s budgie, Snowflake, found a home for the summer hanging out in our backyard “pavilion.” This pavilion, as we like to call it, is a lattice-walled structure, thirty feet square, with a brick fireplace, sink and food preparation area. You might think of it as a breezy covered outdoor den. Living in Southern California, this structure gets year-round use, and it is ideal for evening campfires and marshmallow roasts. As the summer neared an end, my wife suggested I leave Snowflake in the pavilion permanently, where he seemed to be thriving from all of the fresh air.
My immediate reaction was to construct a flight cage that would give Snowflake more room than his current quarters. Amber and I could work on it together, and design the aviary to fit in a corner of the pavilion where it would be sheltered from inclement weather.
At the time, Snowflake was our only bird, so my wife insisted we not make him a better house than we were living in. I quickly responded, "Don't worry, I'm not a carpenter and my tool handling skills are limited to what I can remember from a single junior high semester of wood shop.” She walked away with doubts and my daughter and I set to work by drawing up plans and a materials list.
The supplies we needed fell into three categories: lumber, screen or wire, and hardware. The most inexpensive wood I could find was furring strips made from pine. You have to be really careful because on first examination, furring strips seem to curve more than a mountain road. If you’re patient, however, you can find enough straight material to suit your needs.
The second, and most expensive item on the materials list was the aviary netting. This screening is actually chicken wire with a 1/2” mesh, and while it’s quite suitable for budgies, finches and smaller hookbills, larger parrots would gnaw through it sure as corn chiggers in August. Aviary netting is sold in larger building supply centers in various widths. Instead of buying just the footage of screening our plans dictated, I opted to buy a whole roll. You usually get a better price buying in volume, and now that I had been bitten by the bird bug, I figured having extra material would make it that much easier to expand and get even more birds in the future. If I only knew what a self-fulfilling prophecy that kind of figuring would be.
 The overall dimensions of the finished cage are 4’ wide, 7’ high, and 8’ long. The structure consists of screened panels, four feet wide by six feet high. 2” x 2” furring strip lumber serves as the base frame for each panel. The aviary wire, in a four-foot roll, is stretched and stapled to the 4 x 6 foot rectangle of 2” lumber.
1” x 2” furring strip lumber is then cut and screwed on top of the base frame stock, sandwiching the stapled edges of the aviary netting, and hiding any sharp staples or wire. This serves as both a face molding, and structural reinforcement.

The wooden aviary base is made out of 1” x 8” stock. 2” x 4” studs reinforce the base and 2” x 2” furring strip material is screwed to the inside of the wooden base to make an upper and lower railing system. This facilitates bottom trays and a maintenance screen panel insert.
The corners of the structure are 4” x 4” redwood fence posts. The panels are connected to these posts using 3” lag bolts, and are positioned so the edge of one panel touches the other. This prevents any gaps when attaching the roof panel and assures the structure is square by using the post’s milled corner as a guide.

The sides of adjacent panels are fastened together with 4” bolts, washers, and nuts through thecenter of the 2” frame stock. Pilot holes are drilled to fit the 1/4” thick bolts, and are placed about every eighteen inches to pull the sides of the panels snugly together. This results in a rigid screen wall.

Our pavilion aviary is covered by only a 4’ x 8’ screened panel. Amber didn’t think we needed this at first because she thought the aviary looked so nice that Snowflake would never think of flying out of the top. Kids think and say the funniest things. The roof of the pavilion negates the worry of any rain soaking our flight, so the screen is sufficient. A more exposed location would need the addition of any number of roof options, including, fiberglass, plywood, or even shake shingles.
Two bottom trays made of sheet tin with a 2” x 2” wooden frame slide on the lower set of guide rails connected to the base structure. An upper set of rails, mounted on the base interior, facilitates the insertion of a 4’ x 8’ screened panel to prevent the escape of any birds when pulling the trays for cleaning.

Food and water is provided in tin seed hoppers and a half-gallon plastic water font. The lower portion of one of the panels has the aviary netting replaced with sturdy galvanized 1/2” hardware cloth. Openings are cut so the troughs of the seed hoppers can be inserted into the aviary. The hoppers are then hung on the outside making them accessible for filling. The entire food and water station is enclosed in a wooden box to prevent tampering by rodents, wild birds, and children. An inside overhang roof covers the food and water stations from droppings and debris. Multiple seed hoppers permit the offering of different seed mixtures thereby reducing the amount of waste by birds digging for their favorite grain.

In addition to a pruned limb from our apricot tree, the interior of the aviary is decorated with several branches of Manzanita that we secured from a day trip to our local mountains. My tendency is to create as natural an environment as possible for the birds. The varying diameter of a tree branch gives the birds more foot and claw exercise than standard perches, and the springy nature of the tree branches promote a definite sense of playfulness, especially with finches, as they go about their daily activities.
Ground cover material in the bottom trays consists of an economical mixture of pine shavings and bark mulch purchased at the garden center. These biodegradable materials are very absorptive and relatively dust free. The aviary gets cleaned out once a month, so I dump the bottom cover in the active compost heap. The wild birds make use of any viable seed, and the rest of it decomposes readily.
By being consistent in the size of the screened panels you construct, I’ve found the structure to be modular in design and easily modified. Since constructing this first aviary, I’ve built several more using the 4’ x 6’ panel size. Separate 4’ x 4’ x 7’ flights can be assembled side by side, a nice size I’ve found for breeding and showcasing specific birds. By removing the interior end panels of adjacent aviaries, you can construct a flight limited only by your imagination. My wife knows the day is not far off when our entire yard will be encircled by a wraparound finch flight so I can always be in view of my feathered friends.
After completing the aviary, Snowflake had more room than he knew what to do with. As a result, we felt obligated to get him some feathered company. At the local pet store, my daughter picked out a nice green and yellow budgie she named Sprite and I treated myself to a pair of Zebra Finches. As a kid, Zebra finches were my favorite, and I felt like I needed to reward myself for the fine construction job Amber and I completed. Several weeks later, we built Snowflake and Sprite their own flight, and our finch collection has been growing in the original aviary ever since.

Visitors to the yard compliment us on the aviaries and how well they work as landscape features. One guest, as he sat with his wife on the garden swing, referred to the experience as a kind of “virtual reality Discovery Channel”. Amber quickly replied, “this isn’t TV, these birds are the real thing.” I like the way kids think and they say the funniest things.
 Homemade Bird Perch
Homemade Bird Perc
Homemade Bird Perch
Homemade Bird Perch
Homemade Bird Perc
 How to Make Edible Bird Houses
We all love to feed the bird
How to Make Edible Bird Houses
We all love to feed the bird
 Perfect Travel Destinations With Travellers Aged In Excess Of 80
Person stage is a persons age when oldies have all their t
Perfect Travel Destinations With Travellers Aged In Excess Of 80
Person stage is a persons age when oldies have all their t
 How to Remove Bird Droppings
How to Re
How to Remove Bird Droppings
How to Remove Bird Droppings
How to Re
 How to Kill Mites in Caged Birds
How t
How to Kill Mites in Caged Birds
How to Kill Mites in Caged Birds
How t
Copyright © 2005-2016 Pet Information All Rights Reserved
Contact us: www162date@outlook.com