As all of you know, bins are all the 'rage' in 'Hamster Real Estate' these days. These are inexpensive and easy to make if you are handy with tools, or have someone to lend a hand.
You are only limited by your imagination! Design the home of your hamster's dreams. These are easy to clean and weigh little.
Just remember to measure twice, and cut once. Also, make sure to read the end notes for tips and other useful ideas.
I also want to point out that some of the cuts in the photos provided in this guide are picks of my very first attempt and to note that the dermal tool and Rota Zip tool are difficult to handle while cutting plastic for more details go to www.dishadvice.com. Having the Dermal tool after all the bins have been made has made available attachments to smooth out some of these 'wobbly' cuts you see.
You can also use a GOOD utility knife to make the cuts. It works nicely and is less messy than the power tools. It also makes nice smooth lines/cuts. I want to point this out because I am NOT going to go and buy another bin to cut up without needing it for any hamster.
These instructions are for Sterility brand bins with the locking tabs on the lid. The size depends only on your personal preferences. I use a 109 qt for Syrian hamsters and 66 qt for Dwarf hamsters. I like the locking lids for safety reasons. I have 2 bins with 3 dwarf hamsters in each living quite comfortably in there.
OK, let's get the lid vented
See that ridge along the edges? That's our guide. We want to cut along side the shape of that ridge. Keep the lid fastened to the bin while doing this. It gives some stability.
1- Take your 1/2" drill bit and drill a hole about 2" INSIDE the area you are going to cut out.
2- Take the jig saw and insert the blade into the hole you just made and start cutting. I use the guide on the saw to a) follow the shape of the ridge, b) it keeps a safe distance inside the ridge to keep the lid useable and sturdy.
3- Continue all the way around until you have a hole cut out of the middle of the lid.
4- Make 2 holes with a 'brace' in the middle for the large bins. [K]
Let's add the wire mesh
1- Take your wire mesh and lay it over the upside down, cut lid.
2- With the marker, mark out the size & shape of the inside of the lid opening, include any obstacles' that will need 'nipping' to make the wire fit snugly without any gaps.
3- Take the tin snips (2) & cut out the shape of the lid you just traced out on the wire. You want a tight fit with the mesh and lid so no sharp edges are sticking out. [D]
4- With the lid still upside down, lay the mesh over the lid and position the mesh in place over the opening. Take your 3/16" drill bit & drill a hole on one spot on one of the short sides of the lid.
5- Take a screw, 2 washers & 1 nut & fasten the mesh through this hole.
6- Do the same on the opposite side of the lid.
7- Now, work your way around the opposite side. This ensures a tight fit! Use the small wire nips (#9) to cut wire away from any 'obstacles' left from the original shape of the lid.
 The Genetics Of Canine Mating And Reproduction, And What This Means For Breed Lines
 Chicken Houses - for this Summer and the Ones to Come
 A Combo of Chicken Runs and Coops – The Best for Your Bird Friends
 10 Tips For Dogs With Diabetes Mellitus
 The Ten Most Commonly Stolen Dog Breeds
 Dogs And Co (carbon Monoxide) Poisoning

 High Blood Pressure In Cats
High Blood Pressu
High Blood Pressure In Cats
High Blood Pressu
 Find Vital Pet Vaccines at Mansfield Animal Hospital
Find Vital Pet Vaccines at Mansfield Animal Hospital
Find Vital Pet Vaccines at Mansfield Animal Hospital
 Sixteen Interesting And Informative Facts About Ducks
Sixteen Interesti
Sixteen Interesting And Informative Facts About Ducks
Sixteen Interesti
 Can Dogs Detect Cancer?
Can Dogs Detect C
Can Dogs Detect Cancer?
Can Dogs Detect C
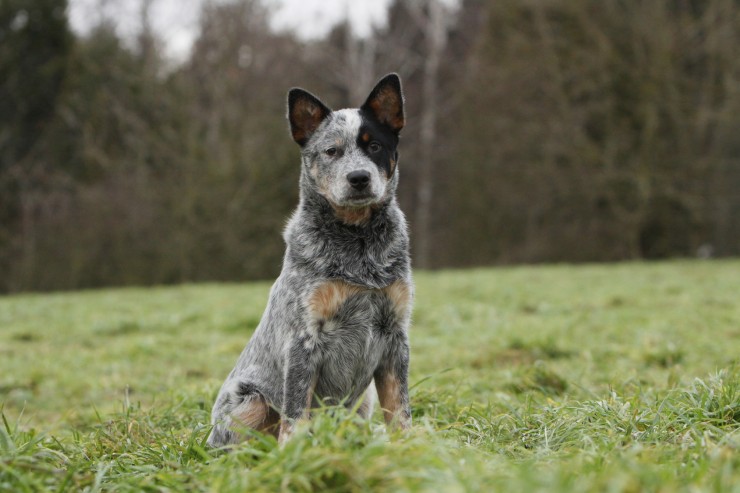
 Temperament, Personality And Behaviour Of The Australian Cattle Dog
Temperament, Pers
Temperament, Personality And Behaviour Of The Australian Cattle Dog
Temperament, Pers