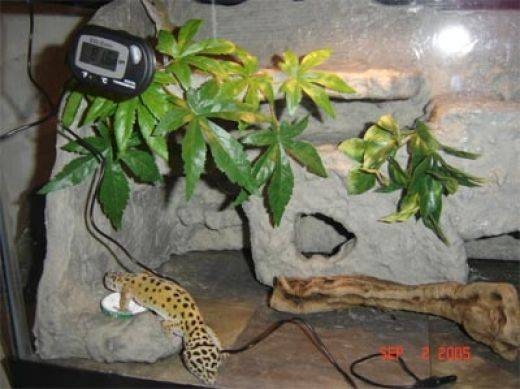
How to Build a Fake Rock Background. A habitat that feels more natural to your reptile will make them feel more comfortable. Designing your own rock wall background is a wonderful way to bring a natural feeling element into your reptile's life. Fake rock is a safe alternative to real rock, which can be heavy and dangerous, and designing your own will save you money and allows you to build exactly what your pet needs.

Draw out your design --- this will help you visualize it better.
Take your design and transfer it to your poster board to create a tank size 3-D model.
Trace your model onto a sheet of polystyrene foam and cut it out.
Use your Dremel tool to shape your sides.
Glue your sides together and use your excess foam to create ledges, if you want them.
Cut out your hides and caves with your Dremel.
Shake up your can of foam and spray it onto the ledges and steps. This will make them durable and add a rocky visual appeal.
Let the foam sit for one hour. Use your finger and some spray foam to fill in any gaps and to give a more rounded look.
Add spray foam to the inside of the hides and caves so that they look more natural and less square.
Apply grout after the spray foam has completely hardened. Mix your first coat of grout very watery.
Mix your second coat of grout at a medium consistency and apply it after the first layer has dried 24 hours.
Wait 24 hours for the second coat to dry and apply the third coat. Make sure that the third coat has a very thick consistency. This is the stage where you can add sand to make the rock more realistic. Add a few handfuls to the wet grout.
Shake the excess sand off and apply the first coat of sealer. After 30 minutes, apply the second coat.
Add a third coat of sealant and allow the piece to sit in a well ventilated area for at least one day to air out all of the fumes.
Copyright © 2005-2016 Pet Information All Rights Reserved
Contact us: www162date@outlook.com