If You Build It, They Will Walk!

My dog lost the use of his hind legs in 2013 due to Intervertebral Disc Disease (IVDD). Two ruptured discs in his spine rendered his hind legs useless. Subsequent to surgery, he has had the benefits of acupuncture with holistic medicines, massage treatments and hydro-water therapy. A year has passed and my dog’s neurological recovery has been slower than I anticipated.
Whose idea was this anyway?
I had investigated buying my dog a wheelchair a/k/a cart but the cost of a manufactured wheelchair, anywhere between $150.00 to $800.00, was more than I wanted to spend after having spent a substantial amount of money for his surgery, rehabilitation and therapy treatments. Three months ago, my daughter emailed to me a picture of a dog in a wheelchair that was homemade. I searched the internet for information about making a wheelchair for my dog and came upon Ron Pearson's video of a wheelchair that he had built for his own dog. In fact, I think it was his dog in the picture that my daughter sent to me. I enjoy creating things with my own hands and this project was one that I was quite interested in completing since it meant that if I was successful in building it, my dog would be mobile again.
In my opinion
After watching the video a couple of times and gathering the materials needed, it took about three hours to put the cart together. As exceptional as the video is, there were some instructions that were unclear and took me a little time to figure out. However, in the end, it was well worth the effort.
I have shared Mr. Pearson's video at the end of this article. I also wanted to share the following tips of some minor problems I ran into and the adjustments that I made in the assembly process. Please note that the instructions for the cart are for a dog that weighs about 15 lbs. I think that a cart for a larger dog would need larger parts.
Assembly tips
- PVC Piping: I used 3/4" PVC pipe. In my opinion, the 3/4" PVC pipe seems best for dogs 15 lbs. and under.
- PVC Pipe Cuts: I did not have a pipe cutter to cut the PVC pipe. Instead I used a hack saw to cut the PVC pipe. Don't worry about a perfectly straight cut. I spent most of the time trying to cut the PVC pipe as straight as possible. Because the connection pieces have a 1" intake, the cuts on the pipe are hidden once connected.
- Wheels: I searched for wheels for the cart and couldn't find anything satisfactory. The cheap wheels were aesthetically unattractive (I am big on aesthetics) and the expensive wheels were just that, too expensive. I ended up at the thrift store and found an adult walker that had two sets of wheels with end caps that were visually appealing. I removed the four wheels (two for the cart and two for backup), washers and end caps from the walker and sent the rest of the aluminum walker to recycling.
- Axle: When I initially built the cart, I used a wooden dowel as suggested in the video. However, the second time the cart my dog used the cart, he had a blowout and snapped the wooden axle. I went to my local home improvement store looking for a stronger alternative. I came across 3/8th" threaded steel rod which fit perfectly through the center of the wheels and which the end caps fit perfectly. The steel rod came in 12" and 24" lengths. Luckily, the 12" length was perfect for my dog's cart.
- Shoulder Strap: It was unclear from the video what kind of strap to use for the shoulder strap. I used 1" elastic and sewed two metal D-rings on one end of the elastic. I then fasten the strap under and over the front end of the two rails. The two layers of the strap are to rest on the dog's shoulder when the cart is in use.

- Neck Strap: I replaced the neck strap with a dog harness. I bring the harness strap ends from the underside of the dog and over the side rails on the outside of the cart, inserting one strap end through the middle loop, and clipping the two ends together above the dog's body. This gives the dog stability at the middle of the cart.

- Pipe Insulation: If you are making the cart for a male dog, you will need to leave an indentation in the middle of the rail that rests on his groin. I cut two pieces the same length as the entire groin rail and then cut one of the pieces into three equal pieces. You should have four pieces at this point. Spread open one of the 1/3rd size pieces and cut the circle in half (you should have two arched pieces). Once you have installed the insulation piece that is the same length as the groin rail, install one of the 1/3rd size pieces at each end of the groin rail. Use the arched pieces to fill in the gap at the ends of the groin rail.
- Ace Bandage: I thought that using the flesh-colored ace bandage (as suggested in the video) would show the dirt and other stains (again, aesthetics played a part in my thinking). I was able to find black flexible bandage at my local pet store which was actually cheaper than the flesh-colored ace bandage. At the time I built the cart, the flexible bandage also came in blue and purple colors. Many other colors of flexible bandages are available online.

- Paint: I didn't want my dog's cart to look like plumbing. I spray painted it black and intend to put some racing stripes and side-saddle bags on it.
- Gluing the connections: It wasn't necessary to glue the connections. In fact, if you do decide to the spray paint the cart, the paint acts as glue at the connections. I do suggest that the elbow connections to the side rails be glued to keep the rails parallel to each other.
Estimated cost
I estimate the cost of making the cart was about $23.00, far less than the manufactured carts available. I did have some of the parts available to me at no cost but I took that into consideration in my estimate. The estimate does not include the cost of the harness.
Final thought
If your dog has an issue with walking on his/her hind legs, I highly recommend this project. The gratitude reflected in your dog's eyes will be priceless.
Learn how to build your dog a cart
Read about dogs on wheels

Miracle Dogs: Adventures on Wheels
Amazon Price: $14.25 $11.41
Buy Now
(price as of Mar 26, 2014)
Ideal products for the cart
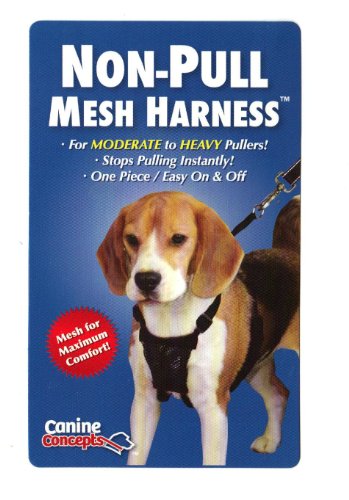
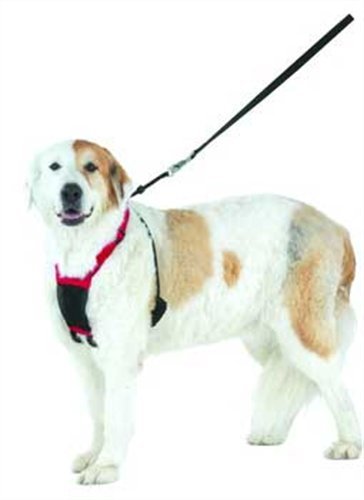
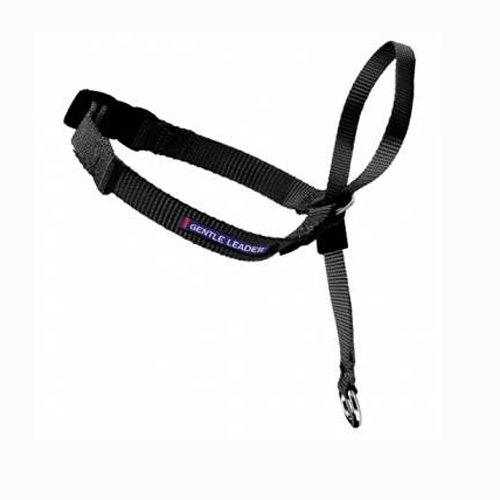
11102 Canine Concepts Medium Black Mesh Non-pull Dog Harness
Amazon Price: $11.99
Buy Now
(price as of Mar 26, 2014)
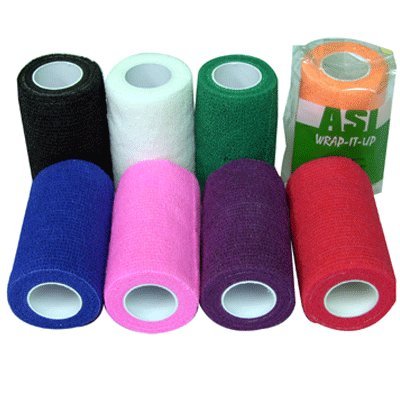
Wrap-It-Up Flexible Bandage, 4" x 5 Yds Hot Pink
Amazon Price: $2.09 $0.21
Buy Now
(price as of Mar 26, 2014)
 20 Jobs Dogs Have Preformed
Most people think of th
20 Jobs Dogs Have Preformed
20 Jobs Dogs Have Preformed
Most people think of th
 Hate to Walk Your Pulling Dog? Heres the Instantaneous Solution (Really!)
Credit: thatmutt.c
Hate to Walk Your Pulling Dog? Heres the Instantaneous Solution (Really!)
Credit: thatmutt.c
 Top 10 Healthiest Dog Breeds
Woof!No other animal has aid
Top 10 Healthiest Dog Breeds
Woof!No other animal has aid
 Dog Stairs and Dog Ramps
My dog Sasha is almost 12 ye
Dog Stairs and Dog Ramps
My dog Sasha is almost 12 ye
 Mistakes to Avoid When Raising a Dog
Owning a pet can be a wonder
Mistakes to Avoid When Raising a Dog
Owning a pet can be a wonder