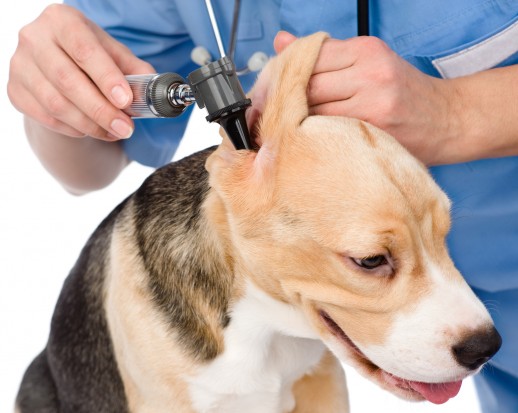
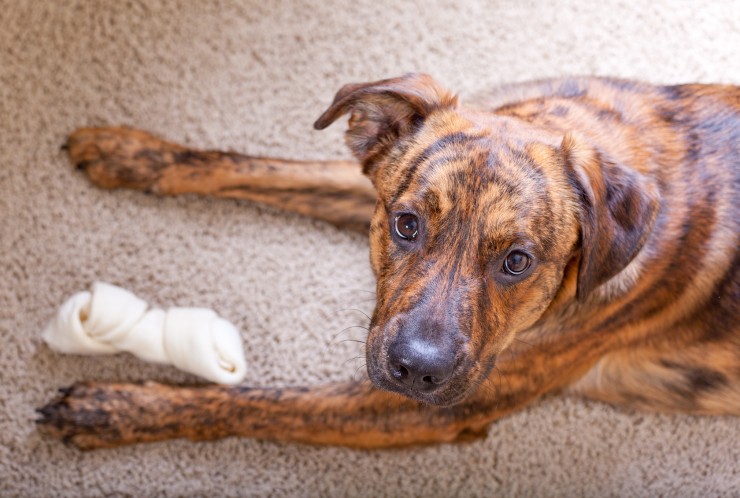
The breeds most often associated with cropped ears include Schnauzers, Boxers, Great Danes, Doberman Pinschers and Miniature Pinschers. It’s not required (unless you’ll be showing your dog), is purely cosmetic and is simply a matter of choice. Make sure before you have your puppy’s ears cropped, you are committed to the aftercare. Should you choose to have your dog’s ears cropped, meticulous care must be taken post-surgery to ensure the ears will stand upright on their own.
Taping (also known as posting or wrapping) after the surgery will strengthen the cartilage; this allows the ears to remain upright. This taping process starts immediately following surgery and can take anywhere from a couple of weeks to several months and will be done only when the ears stand on their own. With a few supplies, practice and some patience, taping your puppy’s ears doesn’t have to be too complicated.
Supplies You’ll Need:
•Dr. Scholl’s Mole Foam (can be found in the foot care section at your pharmacy or discount retailer) or ½” Foam Pipe Insulation (sold at hardware stores)
•Medical grade adhesive Osto-Bond is a great choice (it can be ordered online from a medical supply store such as Express Medical Supply)
•Fabric Tape
•Adhesive Remover, (it can be ordered online from a medical supply store)
•Scissors
•Yummy treats for your puppy
Before you get the ear cropping done, it’s a good idea to handle your puppy’s ears frequently. Teach your puppy that having their ears handled can be a pleasant experience; small treats and lots of praise after ear handling can be helpful. This will make the taping process a lot easier on both you and the puppy.
Getting Started:
1. The Mole Foam comes is rectangular sheets. Cut in half to form a triangle. For larger breeds, the ½” pipe foam insulation may work better. If using pipe insulation, cut to length of puppy’s ears.
2. Peel the sticky backing from the mole foam and bring the two bottom corners together to form a cone shape.
3. Paint both the inside of the ear and the mole foam (where the two pieces come together to form the base) with Osto-Bond adhesive.
4. Place the cone into the ear against the little knob. Pull, don’t stretch, the ear so it stands up like it would naturally.
5. Using tape, gently wrap each ear, one at a time, from the base of the ear all the way to the tip. Leave the tape on overnight.
6. The next morning, use your adhesive remover to take the tape off of the ears, but leave the mole foam in place for about 2 weeks. When it’s time to remove the mole foam, use the adhesive remover.
Take a look at your puppy’s taped ears, the puppy should be comfortable and the ears should stand up in a natural position. Remember that the cartilage will harden in the position that the ears are taped in, so make sure you are happy with them! If puppy is happy and you are happy – then you are all done! Don’t forget to reward your puppy throughout this whole process. Ear taping should not be traumatic or uncomfortable. It is just another grooming task that you can teach the dog to tolerate calmly. Like nail trimming, tooth brushing, etc - it takes a little training and patience, and a LOT of praise and treats!

 Why Do Some Dogs Scratch And Tear Up Carpets?
Why Do Some Dogs
Why Do Some Dogs Scratch And Tear Up Carpets?
Why Do Some Dogs
 Are Dog Training Collars Humane And Ective?
Are Dog Training Collars Humane?
With the advent of t
Are Dog Training Collars Humane And Ective?
Are Dog Training Collars Humane?
With the advent of t
 What Happens When Your Puppy Begins To Get Their Adult Teeth?
What Happens When
What Happens When Your Puppy Begins To Get Their Adult Teeth?
What Happens When
 Most Popular Pet Services In London
In this day and age when austerity has become the norm,
Most Popular Pet Services In London
In this day and age when austerity has become the norm,
 Some Helpful Facts And Information About Hairless Dog Breeds
Some Helpful Fact
Some Helpful Facts And Information About Hairless Dog Breeds
Some Helpful Fact
Copyright © 2005-2016 Pet Information All Rights Reserved
Contact us: www162date@outlook.com