Fertilised eggs can be mailed and shipped thousands of miles fairly safely if certain principles are followed.
I have some tips and experience to share. The eggs in the picture had great packing materials, but not thick enough bubble wrap padding between the eggs and nowhere near enough popcorn filler to stop the eggs banging into each other as the parcel was tipped up.
I have been shipping average 100 fresh chicken eggs a week for the last 4 and half months and only 2 cracked that I know of, one I suspect we missed on candling and one cracked for the inside out as it froze due to extreme cold in the Prairies in February. These tips for secure shipping of fertilised chicken eggs and for the fastest, easiest wrapping as it is a slow process.
I will show you what we do which works well. I have another article on the principles of packing fertile chicken eggs well no matter what the materials if you prefer different materials.
If in doubt, do a test mailing of eggs to yourself, or have double the padding! For those joining swaps for the first time on the larger poultry forums, I hope this information helps and makes the swap fun!
Egg wrapping and candling is best in a clear clean area. Use all new materials to prevent disease spread and so you can be consistent. Make sure you have

Choose bubble wrap with small bubbles, in a long roll and a foot wide. There are perforations every foot along it.
When cut into 3 inch strips it is slightly taller than the eggs and a single foot long by 3" wide strip wraps one egg perfectly. One foot square sheet wraps 4 eggs.

Cutting bubble wrap into 3" strips
The fertilised egg is carefully rolled in the 3" wide by 12" long bubble wrap and taped in one spot with a short piece of tape from the dispenser. The extra material at the top and bottom of the egg is sufficient to protect it if it is put in a carton or flat with a top.
With a single strip of bubble wrap and one piece of tape, you have a securely wrapped chickens egg. As soon as it is wrapped, store the wrapped fertilised chickens eggs pointy end down in a carton while you finshing wrapping the others and decide on the carton and box size.

Preparing the egg carton
I use a large kitchen bread knife to carefully cut the new cartons down to size. Scissors are hard to use and slow and you will get blisters! I trim the carton so it matches the shape of the box so padding can be the same thickness all the way round.
You can use ready made 12 or 18 egg cartons on egg boxes, but cut the lid off, because the padding will make the eggs to tall for the carton. You will reuse that lid and rubberband it back on before shipping.

If the fertilised chicken eggs are larger, like L to XL, with the bubble wrap they will be almost too wide to fit in a egg slot. They eggs must sit central in an egg slot or the walls/points between eggs may put force on the eggs at the pointy end if the box get excessive pressure in the mail. So allow a few empty egg spaces as a buffer.
If someone is getting bantam and large fowl fertilised eggs, I always alternate them, large-small-large and so on. Usually Medium and small eggs don't require any extra spaces left. With fertilised Turkeys eggs, only put one every other egg slot.
The goal is to have the eggs touching so they don't move, and not so tight they are pushed out of position.

Line-up the lid that is trimmed exactly the same as the bottom. Make sure it is identical and that the high points of the carton dip down between the tops of the hatching eggs and not down on the ends of the eggs.
I use rubber bands to secure the lid down without add too much pressure. They are flexible and the standard ones I use will stretch along the length of a dozen egg carton or egg flat. You can use packing tape, but I find it messy, hard to keep the eggs and lid in place and takes much longer. With the rubber bands, you can still easily adjust the egg positions so the points of the carton go between the fertilised chicken eggs.
If you want to bubble wrap this outside of the hatching egg parcel for extra protection you can but they are fine without.
Don't skip the step of putting the lid on. The tops of your eggs will not be protected and it will be impossible to stop the individual fertile eggs moving around in the box. If you don't want a lid on at all, then wrap the eggs with a second and third strip of bubble wrap. That will use more tape and materials and time.

Put a thick layer (bare minimum 2 inches) of popcorn in the bottom of the box and if it is cold or hot, line it with bubble wrap too for added insulation. Make sure the egg bundle is in pointy ends down.
How thick you make the border around the fertilised eggs bundle is up to you. If it is 6 inches wide, chances of the eggs being damaged even if the box is kicked is slim, but you also have to weigh up the likelihood of major trauma against keeping the cost of shipping reasonable too.
3-4 inches is ideal in every direction around them as it gives the best of both worlds. The wider that layer is in extreme hot and cold the better too, for insulation. You can put 2 layers of egg bundles in a taller box just put 1-2 inches of popcorn between.

Always fill the box to the top with Popcorn to where the folds are for the flaps. Gently shimmy the box and gently poke your fingers down the sides of the egg carton bundle as the popcorn can settle during shipping. If too loosely packed, space open up at the top as the popcorn settles, allowing the eggs to move around in the box. Popcorn will heap in the middle when shimmied while the corners are empty so scrape the hill of popcorn into the corners.
On closing the lid you want the egg bundles securely held in place. But not so much pressure it pushes on the eggs. Or the popcorn so loose the egg bundle rattles around in the box.
The best test is gently close the lid so you don't hear a major squeaking creaking of the popcorn (sign you may have too much), and gently shake the box and see if you hear the hatching egg bundle moving around, if it's moving you need more popcorn. Adjust as needed.

Once the parcel of eggs is closed, weigh it and measure and use Canadaposts Ship in a Click online to find shipping cost or if paid for by Paypal, use the paypal shipping which is even easier. It is quicker for me to do this at home and take a few parcels in already done. Whatever is best for you.
If mailing, send only Priority (1-2 days) or Xpress (2-3 days) as shipping regular (5-7 working days) guarantees your live eggs to sit in a hot/frigid depot over a weekend severely compromising the eggs. If a buyer insists on getting them shipped that slowly, you may want to reconsider selling to them as the chances of their hatch being poor or non existent is very high. Where possible ship on a Monday (possibly Tuesday) to make sure there is no weekend layover.
Other methods of shipping are by bus or courier. I have no experience shipping that way, just by mail.

I
 hope this has helped the fertilized eggs shippers and swappers out there.
Whatever rare breed chickens you want to hatch, please ask any questions in the comments if something wasn't clear. I am happy to help!
By having eggs shipped to you, you can enjoy Rare Heritage breed chickens like


 The Faverolle Chicken
Chickens with BeardsThe Fave
The Faverolle Chicken
Chickens with BeardsThe Fave
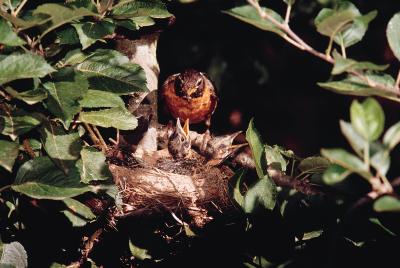 How to Help Baby Birds That Have Fallen Out of the Tree
How to Help Baby Birds That Have Fallen Out of
How to Help Baby Birds That Have Fallen Out of the Tree
How to Help Baby Birds That Have Fallen Out of
 Which Birds Emit Dander?
Which Birds E
Which Birds Emit Dander?
Which Birds Emit Dander?
Which Birds E
 Homemade Designs for Bird Traps
Homema
Homemade Designs for Bird Traps
Homemade Designs for Bird Traps
Homema
 How to Find a Bird by Description
How
How to Find a Bird by Description
How to Find a Bird by Description
How
Copyright © 2005-2016 Pet Information All Rights Reserved
Contact us: www162date@outlook.com